Understanding what the E1 code signifies is the first step. This code typically indicates an issue with the refrigerator’s temperature sensor, suggesting that the sensor isn’t communicating correctly with the unit’s control board. While this might sound technical, don’t worry—it’s like a toddler who’s momentarily forgotten how to communicate their needs. With a little guidance, you can help set things right. In this guide, we’ll take a detailed, step-by-step approach to reset your Whirlpool refrigerator, making it as straightforward as assembling a simple DIY project.
Understanding Error Code E1
Before diving into the solution, it’s essential to comprehend what this error code truly signifies. In the world of refrigerators, the E1 code is essentially the refrigerator’s way of telling you it’s experiencing a problem with its internal temperature sensor. Imagine this sensor as the nerve endings in your fingertips that help you gauge if something is hot or cold. When it malfunctions, it’s as if the fridge has lost its sense of touch—it can’t correctly measure and regulate the internal temperature.
Why does this matter? Well, when your refrigerator can’t accurately sense temperature, it might disrupt its cooling efficiency. It could lead to food spoilage or energy wastage, much like leaving the AC on high during a cool night. No one wants to deal with spoiled groceries or a hefty electricity bill, right?
Now, what causes the E1 error? Often, it might be due to a loose connection, a faulty sensor, or sometimes even a temporary glitch in the system’s electronics. Think of it as a hiccup in the appliance’s regular operation. The good news is that in many cases, addressing this “hiccup” doesn’t require expensive repairs or replacements. A straightforward reset might do the trick.
Steps to Reset Your Whirlpool Refrigerator
Now that you’re familiar with the E1 error, let’s walk through how to reset your Whirlpool refrigerator like an appliance pro. Picture this process as rebooting your computer when it freezes—a simple action that often resolves annoyances.
Step 1: Disconnect the Power
Start by unplugging your refrigerator from the power source. This action is akin to giving your fridge a short power nap, allowing any temporary glitches to correct themselves. Wait about five minutes—much like letting a shaken soda settle before cautiously opening it.
Step 2: Plug It Back In
After the short wait, plug your refrigerator back into the outlet. This step is similar to rebooting your laptop, restoring it to a fresh start. Once powered on, give it a moment. You should hear the familiar hum indicating that it’s back in action.
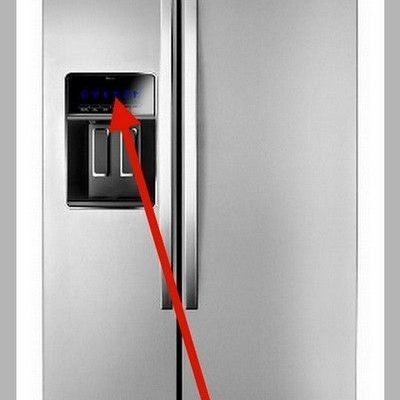
Step 3: Check the Error Code
With the fridge back on, check the display panel. If the E1 code is gone, pat yourself on the back! You’ve successfully handled the reset. If it persists, it might be time to delve deeper, much like when a stubborn stain doesn’t come out on the first wash.
Further Troubleshooting
If resetting doesn’t clear the error, don’t worry. Let’s explore further troubleshooting, much like investigating why a plant isn’t thriving despite regular watering. The next step is to inspect the temperature sensor itself. Often, the sensor might be dislodged or damaged, preventing it from functioning correctly.
Inspect the Sensor
Locate the temperature sensor in your refrigerator. It typically resembles a small bulb or tube attached to the appliance’s interior. Check for any obvious signs of damage or disconnection. Much like ensuring a phone charger is firmly plugged in, ensuring the sensor’s connection can resolve the issue.
Consult the Manual
At this point, refer to your Whirlpool refrigerator’s manual. It’s like consulting a treasure map for detailed guidance on your fridge’s specific model. The manual often contains troubleshooting tips tailored to your appliance.
Seek Professional Help
If the error persists even after these troubleshooting attempts, it might be time to call in a professional. Think of it like calling a mechanic when your car refuses to start—a trained technician can diagnose and repair issues beyond your DIY capabilities.
Preventative Measures
To avoid encountering the E1 error in the future, consider adopting a few preventative measures. Just as routine check-ups keep us healthy, regular refrigerator maintenance can prevent a host of issues.
Regular Cleaning
Ensure your refrigerator interior is clean and free of obstructions. Dust and debris can sometimes interfere with sensor readings. Think of cleaning as giving your fridge a spa day, revitalizing its efficiency.
Maintain Proper Temperature
Keep your fridge temperature at recommended settings, typically around 37 to 40 degrees Fahrenheit for the fridge section. Maintaining this balance prevents strain on the appliance’s components, much like wearing a coat suited to the season.
Perform Regular Inspections
Conduct periodic checks to ensure all components are functioning correctly. Regularly inspect the sensors and control board connections, much like routinely checking your vehicle’s oil level.
By following these guidelines, you’ll not only handle the E1 error code confidently but also ensure your Whirlpool refrigerator continues to function optimally. Remember, a little diligence goes a long way in maintaining the longevity and efficiency of your appliances.