The F1 error code is essentially your appliance’s way of saying, “Hey, I’m having some trouble here!” It usually indicates a problem with the disposal’s motor or an overload issue. Think of it like your car’s check engine light—it’s a prompt to look under the hood, except in this case, it’s more about ensuring your disposal can continue to tackle those food scraps without a hitch. Don’t worry; we’re going to break down the exact steps you need to take to troubleshoot and reset your KitchenAid garbage disposal and get it running smoothly again.
Understanding Error Code F1 and What Triggers It
Let’s start with what error code F1 is all about. When your KitchenAid garbage disposal displays this code, it means the disposal’s motor has tripped due to an overload or blockage. Imagine the F1 code like a circuit breaker that pops when too much electricity tries to flow through it—it’s a safety feature designed to protect your appliance from damage. The motor is essentially saying, “I need a break!” so it shuts down to prevent overheating or burnout.
You might be wondering what could cause this overload. Common triggers include trying to process too much waste at once, dumping inappropriate materials like bones or fibrous vegetables down the disposal, or even a simple food buildup over time. All these can cause the motor to strain beyond its capacity, leading to that pesky F1 code.
Once you understand the cause, the next logical step is to prevent it. Always remember: less is more when it comes to feeding your disposal. Feed food scraps gradually, use cold water to keep things moving, and avoid fibrous or hard materials that could jam the blades. With these precautionary tips in mind, you’re already on the path to reducing future F1 errors.
Step-by-Step Guide to Resetting Your Kitchenaid Garbage Disposal
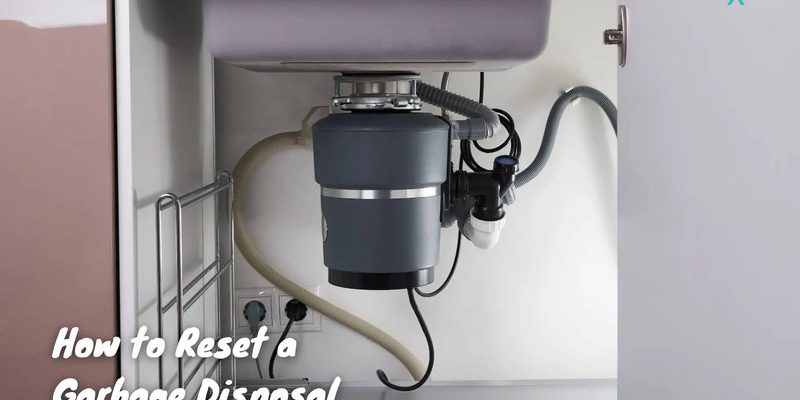
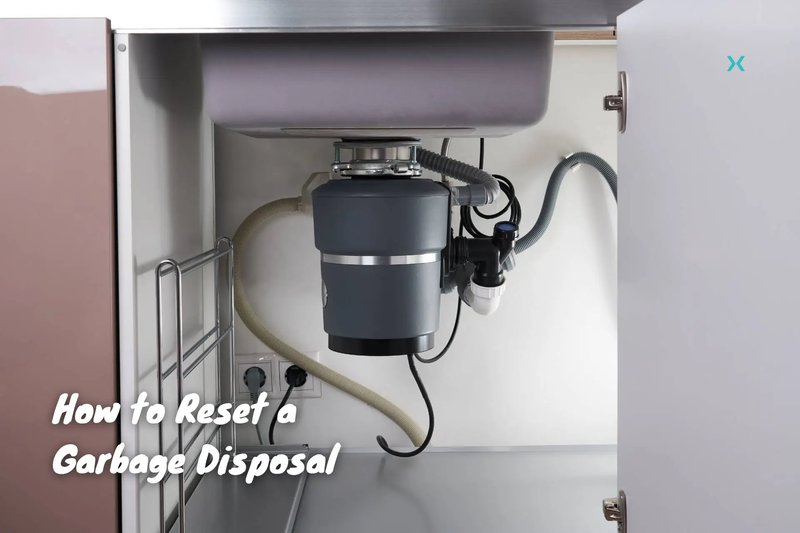
Now, let’s get into the nitty-gritty of fixing that F1 error. The process is straightforward and requires minimal tools, mainly your hands and maybe a flashlight if you need to peek under the sink. First things first, ensure safety by turning off the power to the garbage disposal at your main electrical panel. This is like ensuring your car is in park before changing a tire—just a necessary safety protocol.
Next, get a good look underneath your sink where the garbage disposal is installed. You’ll find a small red reset button on the bottom or side of the unit. This is your goal. It’s similar to the reset button on a power strip; you press it to give the system a fresh start. Firmly press the reset button and hold it for a few seconds. You might even hear or feel a slight click, which is the reset button doing its job.
After pressing the reset button, head back to your electrical panel and turn the power back on. Return to your disposal and turn it on briefly to check if the error is cleared. Sometimes it’s like rebooting your mobile phone—it just needs a moment to regain its bearings. If it’s still not working, a gentle manual check for obstructions inside the disposal chamber might be necessary.
What to Do If Resetting Doesn’t Solve the Issue
Okay, so you’ve pressed the reset button, and the F1 error hasn’t budged. What’s next? This is where a deeper dive might be necessary. Start by inspecting the disposal for any visible debris or jammed food particles. With the power switched off, use a flashlight to peer inside and, wearing gloves, carefully remove any blockages you can see. This is like clearing a blocked drain or a clogged pipe—removing the obstruction can often free everything up.
If there’s nothing visible or accessible that you can safely remove, the issue might be more technical, such as a worn-out motor or an electrical fault. In such cases, the best course of action is to call in the pros. A qualified technician can diagnose more complex issues that might be affecting your KitchenAid disposal and recommend repairs or replacements if necessary.
It’s also worth checking your appliance’s warranty before booking a technician. Depending on the age of your garbage disposal, some repairs might still be covered. Being informed is key, so consult your user manual or the manufacturer’s website for more details.
Preventative Measures to Avoid Future F1 Errors
Now that you’ve tackled an F1 error, it’s time to think about how you can avoid running into the same trouble down the road. Think of this stage as your garbage disposal’s regular maintenance check, much like changing your car’s oil or rotating the tires—simple practices that maintain peak performance.
One effective strategy is adopting a more mindful approach to what goes down the disposal. Chop larger food scraps into smaller pieces before feeding them in, and avoid grinding large amounts all at once. This is akin to feeding a shredder—small, manageable pieces go down smoother and are easier on the motor.
Routine cleaning is also vital to keeping things in top shape. Every few weeks, grind a mix of ice cubes and citrus peels to clean the blades and eliminate odors naturally. Ice helps knock off any debris clinging to the blades while citrus peels can freshen up the disposal. It’s like a mini spa day for your garbage disposal, ensuring it stays fresh and functional.
With these preventative tips, you’ll not only extend the lifespan of your KitchenAid garbage disposal but also keep those F1 errors at bay. So next time you’re facing a pile of post-dinner plates, you’ll know exactly how to keep things running smoothly, one scrap at a time.