Understanding how to reset your Insinkerator garbage disposal when you see Error Code E2 is crucial. It’s a straightforward process, almost like rebooting your Wi-Fi router after a connection loss. By following a few simple steps, you can save yourself the trouble and expense of calling a professional. It’s about taking charge and feeling empowered to solve a minor glitch on your own. You’ll have your Insinkerator back in action in no time, so let’s dive into the world of resets, shall we?
Understanding Error Code E2
When your Insinkerator displays Error Code E2, it’s communicating that there’s been a hiccup in its operation, often related to a motor issue. Imagine your garbage disposal as a robust little kitchen helper. Usually, it’s more than capable of handling anything you throw its way. But occasionally, due to heavy loads or foreign objects, the motor can overheat or become overworked, triggering the E2 error. It’s like your disposal is waving a white flag, signaling for a breather.
This error doesn’t mean your disposal is broken; it’s more of a protective measure to prevent further damage. It’s similar to a car automatically shutting down when it overheats. Your Insinkerator is built with smart features to stop and notify you before things get serious. So, understanding this code is the first step in ensuring your appliance has a long, healthy life.
You might wonder, how does an overload happen? Well, sometimes it’s too much food waste at once or tough materials like bones or fibrous vegetables that can cause strain. If you notice a burning smell or hear unusual noises, that’s your clue to check the unit. The good news is, with a simple reset, you can usually fix the problem without needing to replace any parts or overhauling your machine.
Steps to Reset Your Insinkerator Garbage Disposal
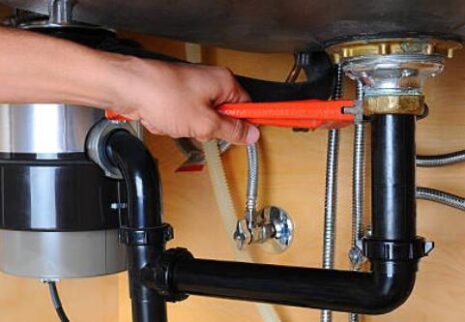
Here’s the deal: resetting your Insinkerator is as easy as pie. First things first, ensure your safety by switching off the power to the disposal. You wouldn’t want your fingers near a working disposal, right? Once the power is off, take a look under your sink. Locate the red reset button on the bottom of the disposal unit. It’s your new best friend for this task.
Press the reset button firmly. If it stays in place, you’re good to go. But if it pops back out, wait 10 minutes to allow the motor to cool down and try again. Think of this process as giving your disposal a little time out to cool its gears. After pressing the reset button, turn the power back on and test the disposal. It should resume its regular buzz, signaling all is well.
In case the reset button doesn’t seem to fix the problem, there might be something lodged in the disposal that’s preventing the motor from turning. Grab a flashlight and see if you can spot any obstructions. If you find something, use tongs or pliers to remove it—never your fingers! After clearing the jam, another reset push should have your disposal running smoothly once more.
Preventing Future Errors
Now that your Insinkerator is back in action, let’s talk about keeping it error-free. It’s helpful to remember that your disposal isn’t a trash can. Avoid dumping large amounts of food waste or tough materials like bones down the drain. Your disposal will thank you by running smoothly without hiccups. Consider running cold water while using the disposal; it helps solidify any grease or oils, making it easier for the blades to chop up debris.
Routine maintenance can also go a long way. Regularly clean your disposal with a mixture of baking soda and vinegar or lemon peels for freshness. This not only keeps your system running smoothly but also helps in reducing odors and preventing clogs. Treat your disposal like the indispensable appliance it is—a little respect goes a long way.
Finally, be mindful of any unusual noises or resistance when using the disposal. These are early warning signs that something isn’t quite right. Addressing these signs promptly can prevent errors like E2 from popping up, saving you time and trouble in the long run. A bit of care ensures your kitchen helper stays happy and healthy, ready to tackle your meal prep leftovers.