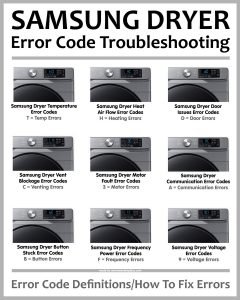
The E1 error code on Samsung dryers usually points to a problem with the drying temperature. Think of your dryer’s temperature control like a thermostat in your home. If it doesn’t function properly, things can get too hot or too cold. In the case of your dryer, this could mean that your clothes don’t dry properly—or worse, they overheat. Understanding and addressing this warning is crucial to keeping your dryer working efficiently and safely.
Why Does the E1 Error Occur?
All right, let’s uncover why your Samsung dryer might be showing this message. Imagine for a moment that your dryer is like a chef making a perfect cake. Just as a chef relies on an oven to maintain the right temperature, your dryer depends on sensors and heaters to keep everything at the perfect level for drying clothes. If one of those components starts acting up, say the sensor is malfunctioning, it disrupts the balance. This is like your oven suddenly deciding it wants to bake at double the temperature. Too much heat could ruin your cake—or, in the case of your dryer, it could damage your clothes or the machine itself.
The most common culprits behind an E1 error are faulty sensors or issues with the heating elements. Sometimes, it’s just a dirty vent or a blocked airflow path that’s causing the dryer to overheat or underheat. However, it’s critical to understand that although these might seem like minor issues, ignoring them could result in more significant damage to your dryer. You might be thinking, “Well, how bad can it get?” Let’s just say that a single broken sensor is a small price to pay compared to the cost of a brand-new dryer—or worse, a potential fire hazard.
Potential Consequences of Ignoring the Error
You might be wondering, “What’s the worst that could happen if I just let the error be?” Here’s a scenario for you. Imagine driving your car with a flat tire. Sure, you might get a few more miles out of it, but eventually, you’re going to end up on the side of the road, calling for help. In the same way, if you choose to disregard the E1 error, you’re setting yourself up for some future trouble. At first, it might just be a minor inconvenience—clothes that aren’t fully dry, energy bills that seem higher than usual, or a dryer that takes longer and longer to finish a load.
However, over time, this negligence can snowball into substantial problems like permanent damage to your dryer’s internal components, leading to costly repairs. Worse yet, safety risks can arise, such as the potential for fire due to overheating. The last thing you want is to put your home in danger because of a simple dryer error that could have been fixed easily. Just like you wouldn’t want your kitchen to suffer from smoke because you left a pot boiling unattended, it’s crucial to address this dryer problem sooner rather than later.
How to Fix the E1 Error Code
So, what can you do if you spot this error? First things first: don’t panic. You can tackle this issue much like you would a puzzle, piece by piece. Begin by verifying the basics. Ensure that the dryer’s vents are clear and not clogged with lint. A clear vent facilitates proper airflow, much like a chimney lets smoke escape from a fireplace.
If the vents and airflow seem fine, it’s time to check the dryer’s sensors and heating elements. These components can often be tested with a multimeter if you’re the handy type. If not, calling a professional might be your best bet. Imagine the dryer as a complex machine with each part playing a crucial role, much like each player in an orchestra. If one section is out of tune, the entire performance suffers.
Once you’ve identified the problem, proceed with the needed repairs or replacements. Here’s a tip: keeping your dryer’s manual handy can be incredibly helpful during this process, almost like having a map when navigating unfamiliar terrain. Also, routine checks and maintenance, such as cleaning the lint trap and ensuring proper installation, can help prevent future errors. By taking these steps, you’re not only fixing the current problem but also investing in the longevity of your dryer.
Preventative Measures and Maintenance Tips
Now that you’ve sorted that out, let’s discuss how to prevent this from happening again. Regular maintenance is your dryer’s best friend, much like regular exercise keeps your body healthy. Make it a habit to clean the lint filter after every load and ensure that the exhaust vent is free from obstructions. This simple act can significantly improve airflow and reduce the risk of overheating.
Consider scheduling periodic checks of your dryer’s components, especially if it’s an older model. Think of this as a routine physical check-up, ensuring everything is in working order. By staying proactive, you’re not just dodging the bullet of future errors, but you’re also enhancing the efficiency and lifespan of your appliance.
Finally, be attentive to how your dryer sounds and operates. Any unusual noise or performance might hint at underlying issues that need addressing. With these preventative measures, you can enjoy peace of mind, knowing that your dryer is reliable and safe for everyday use. And who doesn’t want to avoid laundry day disasters?